

Table of contents
- What You'll Learn:
- Why Spring Boot?
- Why not use Spring directly?
- What do we need?
- Let’s start
- Setting up pom.xml
- Setting up the entry point of the spring boot project.
- Let’s add a controller
- Return Data from the Controller
- Let’s think about the data
- Let’s add a persistence layer: Database
- Setting up MySQL
- Build the School Model.
- Let’s make the Db Access layer (Repository)
- Testing Your Spring Boot API with Postman
The API landscape is booming, and Java Spring Boot stands as a powerful framework for building robust and scalable RESTful APIs. Whether you're a seasoned developer or just dipping your toes in the water, crafting your first API can be exhilarating, but also daunting. This blog aims to be your beginner's roadmap, guiding you through the exciting journey of building RESTful APIs using Java Spring Boot. In this tutorial, we will create every API for a school management system.
After going through this guide, you will be able to build complex applications using the Spring Boot framework. I would encourage you guys to create a small project of your own as well, as we move forward in this guide. During the article, this GitHub Repo will contain the code related to the changes being made.
What You'll Learn:
By the end of this blog series, you'll be equipped with the essential knowledge and skills to:
Grasp RESTful API fundamentals: Understand the key concepts, design principles, and best practices for crafting well-structured APIs.
Dive into Spring Boot: Explore the core functionalities of Spring Boot, learning how to leverage its auto-configuration and development tools.
Build your first API: Create a functional RESTful API, implementing CRUD operations (Create, Read, Update, Delete).
Test and deploy: Learn how to effectively test your API and deploy it to production environments, ensuring its smooth operation.
Ready to embark on this API-building adventure? Buckle up, grab your coding tools, and let's begin!
Why Spring Boot?
Imagine building an app without wrestling with tons of complex configurations. That's exactly what Spring Boot offers! It lets you focus on the fun part - writing code and creating your app's unique features. And guess what? You can even build complex applications with this framework, not just simple ones.
Why not use Spring directly?
There are many reasons why people started moving on from the Spring framework to the smaller-level frameworks. One of them which makes the most sense is the complexity. As Spring itself is a huge framework, it's not always easy to get started and build the application. You need to know a lot of things before you can start building the application. Spring framework was originated to solve the commonly occurring problems in the Companies and provide a single framework to solve them all. But as time went by, building a simple CRUD-based application became pretty hard in the case of Spring framework and Spring Boot came to the rescue.
What do we need?
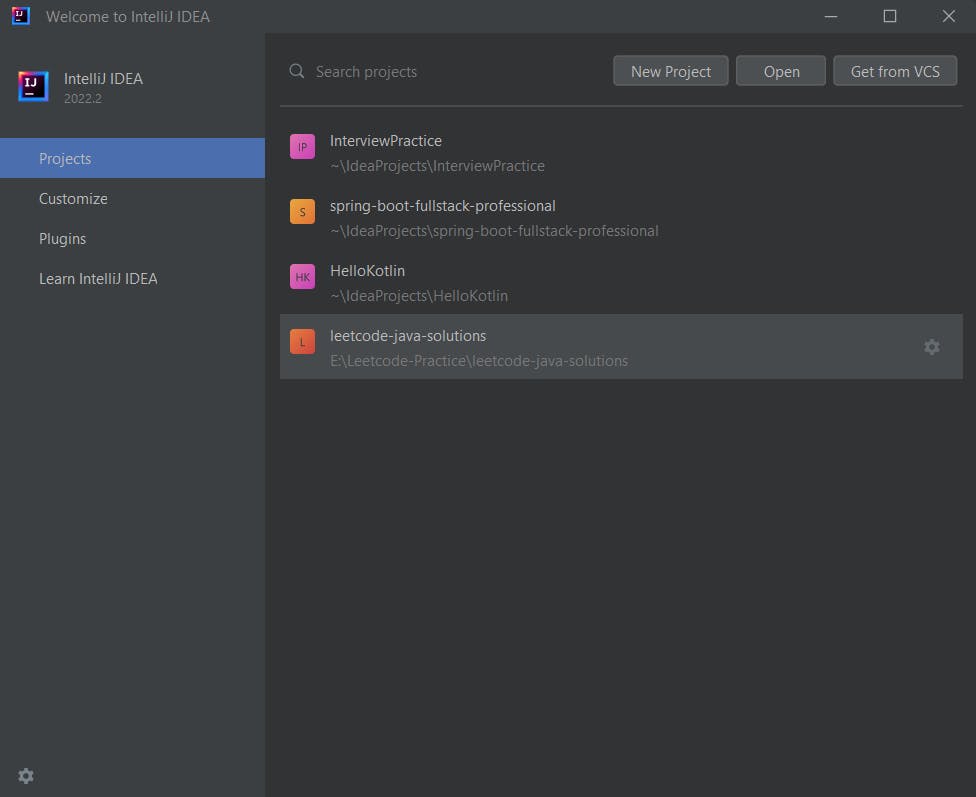
Text Editor (IntelliJ Idea: Community Version): Most Java developers make use of the official IDE provided by the IntelliJ community for carrying out the development work of their project. We are going to use this as well.
Maven: Maven handles the packages required to run the application and other basic requirements to make it work. This helps us to handle all the dependencies easily. Without Maven, you will have to download every dependency download all the jar files and handle the full cycle of updates which itself is a quite hectic process. Maven does it by introducing an XML file that contains the name and version of the package that you need for the development of the given project. This file is known as
pom.xml.Java 8 or above: I will be working on Java 17 in this tutorial. You will also have to use the
JAVA_HOMEenvironment variable. Read this post on how to set yourJAVA_HOMEenvironment variable. Try running these two commands to find out if you are set up properly or not.
java -version
It should give you the output as follows:
java 17.0.10 2024-01-16 LTS
Java(TM) SE Runtime Environment (build 17.0.10+11-LTS-240)
Java HotSpot(TM) 64-Bit Server VM (build 17.0.10+11-LTS-240, mixed mode, sharing)
For setting JAVA_HOME, try this:
echo %JAVA_HOME%
The result for Windows will be,
C:\Program Files\Java\jdk-17
Let’s start
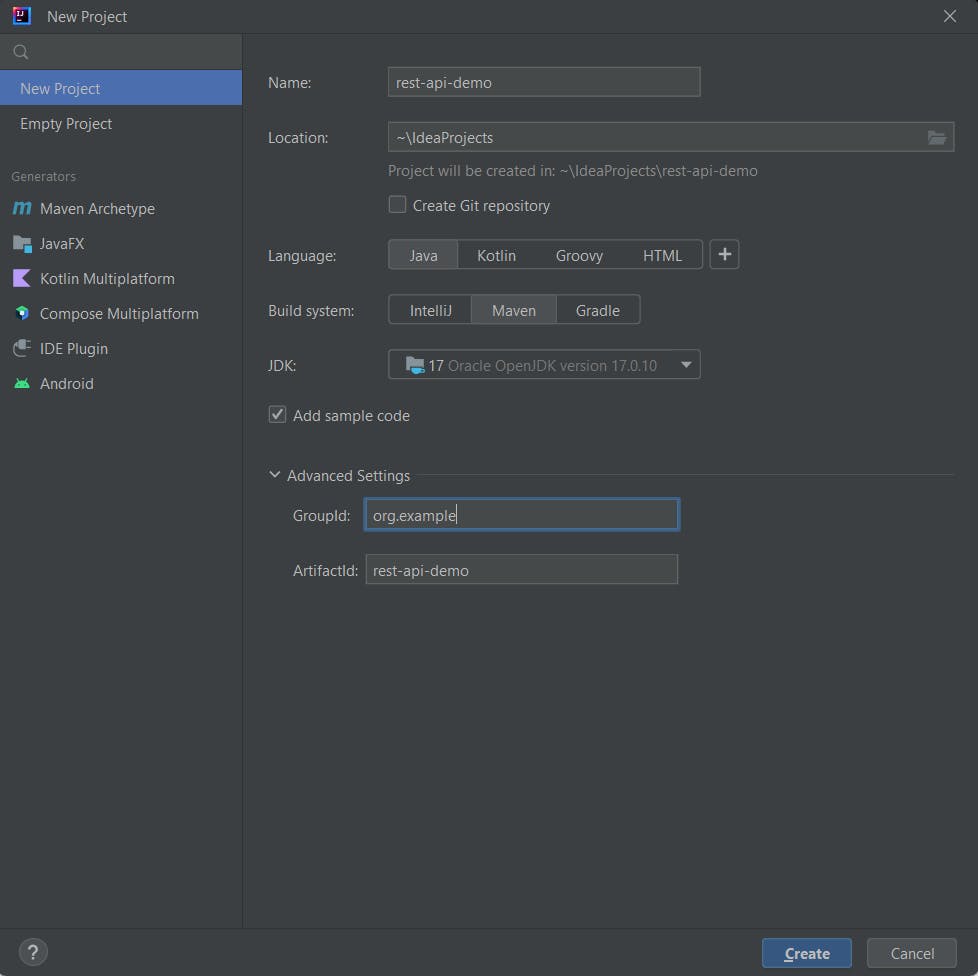
Open up your IDE and create a Maven project with basic defaults selected. Choose some random GroupId and Artifact ID.
Setting up pom.xml
Find thepom.xmlfile and add the following configuration.
<?xml version="1.0" encoding="UTF-8"?>
<project xmlns="http://maven.apache.org/POM/4.0.0"
         xmlns:xsi="http://www.w3.org/2001/XMLSchema-instance"
         xsi:schemaLocation="http://maven.apache.org/POM/4.0.0 http://maven.apache.org/xsd/maven-4.0.0.xsd">
    <modelVersion>4.0.0</modelVersion>

    <groupId>org.example</groupId>
    <artifactId>rest-api-demo</artifactId>
    <version>1.0-SNAPSHOT</version>

    <parent>
        <groupId>org.springframework.boot</groupId>
        <artifactId>spring-boot-starter-parent</artifactId>
        <version>2.5.8</version>
    </parent>

    <dependencies>
        <dependency>
            <groupId>org.springframework.boot</groupId>
            <artifactId>spring-boot-starter-web</artifactId>
        </dependency>
    </dependencies>

    <properties>
        <maven.compiler.source>17</maven.compiler.source>
        <maven.compiler.target>17</maven.compiler.target>
        <project.build.sourceEncoding>UTF-8</project.build.sourceEncoding>
    </properties>

</project>
The parent part in the file tells that we are going to use the given parent and include all the jars that are present in the given group and given version. After adding this data to your pom.xml file, you must update the Maven. In most of the cases, you will see a notification in the IDE itself to update it. Otherwise, you can find it in the IDE’s navbar.
Setting up the entry point of the spring boot project.
Now that our dependencies are sorted, let’s start by building the entry point to the project. To set up the entry point, create a package in the directory src/main/java with whatever name. In the package create a Java class with a name of your choice.
package org.example;

import org.springframework.boot.SpringApplication;
import org.springframework.boot.autoconfigure.SpringBootApplication;

@SpringBootApplication
public class RestAPI {
    public static void main(String[] args) {
        SpringApplication.run(RestAPI.class, args);
    }
}
The first line contains the name of the package that you created. In the 6th line, you are letting the Spring Boot framework know that this entry point of the project by annotating the class which contains the main class. To start the server you have to call a server starting function with the following line:
SpringApplication.run(RestAPI.class, args);
This is all that was required to build the initial server in Spring Boot.
You can click on the Run button. This will run the application. You will see the following output.

Now that the server is started, you can head out to the browser and type in http://localhost:8080 to find the server. You will get the following error message.

That was easy. It’s really easy to set up a server using the Spring Boot framework. Now we will work to create Controllers and various other things to create a proper set of Rest APIs.
Let’s add a controller
Now that we have a simple server set up, let’s move forward and create a valid URL that we can hit and get the response back. For testing purposes, I am going to create the status API. This API will tell us whether the services of the server are up or not. For this purpose, you will need to have a class annotated withRestController. For more information, you can learn more about the MVC framework. Spring Boot allows us to create controllers where we can specify which URL is going to be used to run this particular code.
package org.example.status;

import org.springframework.web.bind.annotation.RequestMapping;
import org.springframework.web.bind.annotation.RestController;

@RestController
public class StatusController {

    @RequestMapping("status")
    public String tellStatus() {
        return "We are up!";
    }
}
Create a file called StatusController.java in org.example.status package and add the following code.
RestController is the part of the code that tells the Spring Boot that this class should be treated as a controller.
Once we have this, we can use the methods which can be used by any controller and written in the RestController static class.
RequestMapping takes two arguments, where you have to specify the path and API Method( GET, POST, PUT). But if you don’t specify anything, it takes GET by default.
Rerun the application and head to http://localhost:8080/status You will get the We are up! message.
Return Data from the Controller
Now, let’s try to pass back data from the Controller. We are going to start with a basic StandardController.java and Standard.java class in the org.example.standard package.
package org.example.standard;

public class Standard {
    private String standard;
    private String section;
    private String classTeacher;

    public Standard(String standard, String section, String classTeacher) {
        super();
        this.standard = standard;
        this.section = section;
        this.classTeacher = classTeacher;
    }

    public String getStandard() {
        return standard;
    }

    public void setStandard(String standard) {
        this.standard = standard;
    }

    public String getSection() {
        return section;
    }

    public void setSection(String section) {
        this.section = section;
    }

    public String getClassTeacher() {
        return classTeacher;
    }

    public void setClassTeacher(String classTeacher) {
        this.classTeacher = classTeacher;
    }
}
package org.example.standard;

import org.springframework.web.bind.annotation.RequestMapping;
import org.springframework.web.bind.annotation.RestController;

import java.util.Arrays;
import java.util.List;

@RestController
public class StandardController {
    @RequestMapping("/standards")
    public List<Standard> getAllStandards() {
        return Arrays.asList(
                new Standard("1", "A", "Mr. Harry"),
                new Standard("2", "A", "Mr. Charles"),
                new Standard("4", "C", "Mr. Ronald"),
                new Standard("3", "B", "Mr. John")
        );
    }
}
In the Standard.java file, we are defining the schema of the standard class along with the getter, setter and constructor functions. These functions will help us to set and get the data for various class variables.
In the StandardController.java file, we are using the same method that we used last time to create an API that allows the GET method with /standards endpoint.
This time the function returns the List data to the endpoint. Spring Boot helps us convert the data in the List to valid JSON and sends back the data.
Here is how it is going to look on the browser.

Let’s think about the data
As we already know how to set up a basic Rest API, we now are going to think about the system that we are going to create in this guide. For the sake of this tutorial, we are going to work with three entitiesSchool,StandardandStudents.
1. Each school can have multiple standards.
2. Each Standard can have multiple Students.
Let’s start with theSchoolentity. For all operations of a school, we will need the following methods.
GET-/schools- Get all schools.GET-/school/id- Get info on the given school.POST-/school- Create a new School.PUT-/school/id- Update info on the school.DELETE-/school/id- Delete the school.
Let’s add a persistence layer: Database
Now that we have agreed upon the basics of the APIs that we are going to develop, let’s just add a persistent layer that can persist data. There is a name for adding this persistence layer to Java, Java Persistence Layer( JPA).
JPA is a type of ORM( Operation Relational Manager). If you have worked on some other framework, you might have heard about this term. An ORM helps us to reduce our effort by providing built-in methods to query data from the database.
We are going to use MySQL for the tutorial purpose. You can go forward and choose any of the databases out there. The only thing that you will have to change is the libraries that you are importing, everything else should stay as it is.
Read this article on how to install MySQL on Windows.
Setting up MySQL
- Now you will have to create a database for the Spring Boot application to interact with. After installing MySQL on your device, open the MySQL Command Line Client, you can create the database using this command.
create database springbootschool;
- Once you are done with database creation, you can add this content to the file
src/main/resources/application.properties.
spring.datasource.url=jdbc:mysql://localhost:3306/springbootschool
spring.datasource.username=root
spring.datasource.password=<Your password>
spring.jpa.hibernate.ddl-auto=update
Note: The first line tells the URL at which Spring could find the database connection. Second-line gives the username of MySQL, who is the owner of the database. The third line is the password of the database. The fourth line is the setting that will help you to auto-generate the tables in the database.
- Adding more dependencies
We will have to add MySQL and Hibernate dependencies so that they can take care of handling the persistence layer for us. Add the following code to pom.xml,
...
        </dependency>
        <dependency>
            <groupId>org.springframework.boot</groupId>
            <artifactId>spring-boot-starter-data-jpa</artifactId>
        </dependency>
        <dependency>
            <groupId>mysql</groupId>
            <artifactId>mysql-connector-java</artifactId>
        </dependency>
        <dependency>
...
Try to build the application once done with the setting. It should be built without any errors.
Build the School Model.
Here is what the org.example.school/School.java file looks like.
import javax.persistence.*;

@Entity
public class School {

    @Id
    @GeneratedValue(strategy = GenerationType.AUTO)
    @Column(name="id")
    private long id;
    private String name;
    private String principle;
    private String address;

    public School() {

    }

    public long getId() {
        return id;
    }

    public void setId(long id) {
        this.id = id;
    }

    public String getName() {
        return name;
    }

    public void setName(String name) {
        this.name = name;
    }

    public String getPrinciple() {
        return principle;
    }

    public void setPrinciple(String principle) {
        this.principle = principle;
    }

    public String getAddress() {
        return address;
    }

    public void setAddress(String address) {
        this.address = address;
    }

    public School(long id, String name, String principle, String address) {
        super();
        this.id = id;
        this.name = name;
        this.principle = principle;
        this.address = address;
    }
}
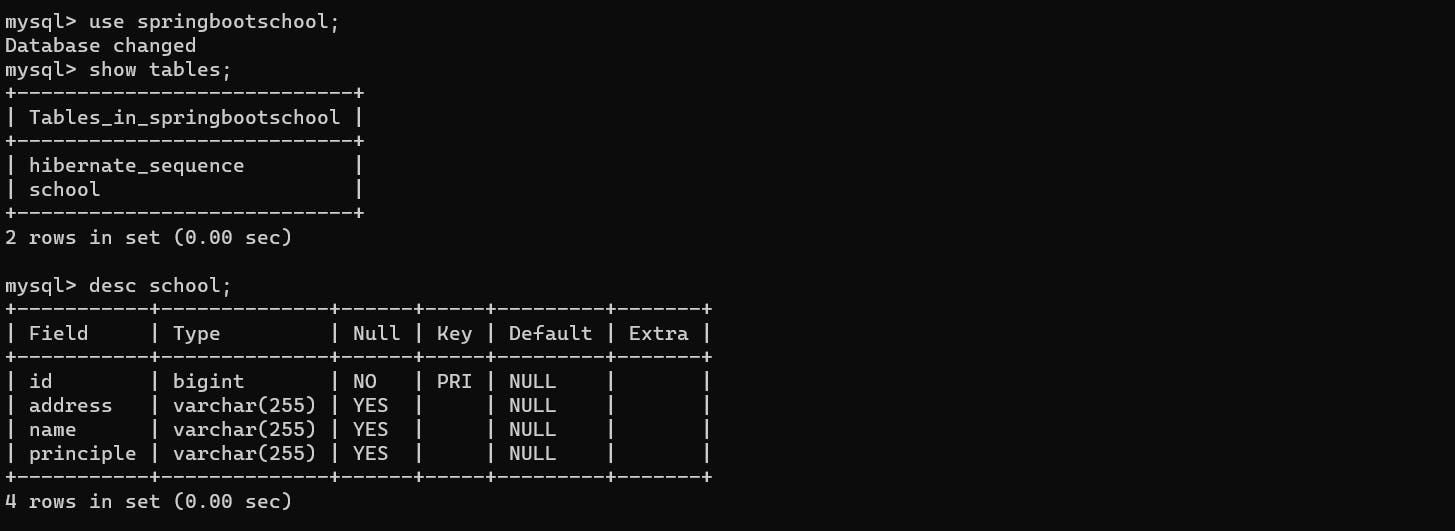
After writing this down, run the application and check the MySQL shell to find the table created.
Note: Sometimes the main Java package doesn’t contain javax.persistence depending on the version of Java that you are using. In that case, you will get an error, java: package javax.persistence does not exist.
All you have to do in that case is add another dependency for, javax.persistence
<!-- https://mvnrepository.com/artifact/javax.persistence/javax.persistence-api -->
<dependency>
    <groupId>javax.persistence</groupId>
    <artifactId>javax.persistence-api</artifactId>
    <version>2.2</version>
</dependency>
Read this Stack Overflow answer for more details.
Entity is the keyword that tells Spring Boot that the following class should be considered as a table class. Class parameters are fields of the table.
    @Id
    @GeneratedValue(strategy = GenerationType.AUTO)
    @Column(name="id")
With these lines, we are letting the Spring Boot know that the field which is annotated with Id keyword will be treated as Primary key. GeneratedValue(strategy =GenerationType.AUTO) tells Spring Boot to autogenerate the value of the id field( By incrementing the field)and Column the field specifies the column name. These are required only if we are doing something else than the normal stuff.
Let’s make the Db Access layer (Repository)
The database Access layer in Java is given the name of the Repository. A simple repository provides all the basic methods required to find, create and delete entries in the database.
Add this code to org.example.school/SchoolRepository.java
package org.example.school;

import org.springframework.data.repository.CrudRepository;

public interface SchoolRepository extends CrudRepository<School, Long> {
}
Basically you have to extend the CrudRepository and create an interface of that. In the params, you have to pass the name of the Java class that you want to extend and type of the primary key being passed (<School, Long>).
We can create another file to handle interactions with the DataBase by creating a Service layer. In Java, it is generally done to separate the business logic from Controllers.
The advantage of using such a service is that Java while building will load all the classes marked as business services as a Singleton and it will not have to create an object again and again.
We can do that by using the @Service annotation. Here is the content of org.example.school/SchoolService.java and the corresponding Controller code.
package org.example.school;

import org.springframework.beans.factory.annotation.Autowired;
import org.springframework.stereotype.Service;

import java.util.ArrayList;
import java.util.List;

@Service
public class SchoolService {
    @Autowired
    private SchoolRepository schoolRepository;

    public List<School> getAllSchools() {
        List<School> schools = new ArrayList<>();
        schoolRepository.findAll()
                .forEach(schools::add);
        return schools;
    }

    public void addSchool(School school) {
        schoolRepository.save(school);
    }

    public void deleteSchoolById(long id) {
        schoolRepository.deleteById(id);
    }
}
package org.example.school;

import org.springframework.beans.factory.annotation.Autowired;
import org.springframework.web.bind.annotation.*;

import java.util.ArrayList;
import java.util.List;

@RestController
public class SchoolController {

    @Autowired
    private SchoolService schoolService;

    @RequestMapping("/schools")
    public List<School> getAllSchools() {
        return schoolService.getAllSchools();
    }

    @RequestMapping(method = RequestMethod.POST, value = "/school")
    public void addSchool(@RequestBody School school) {
        schoolService.addSchool(school);
    }

    @RequestMapping(method = RequestMethod.DELETE, value = "/school/{id}")
    public void deleteSchool(@PathVariable long id) {
        schoolService.deleteSchoolById(id);
    }
}
Looks like we have already discussed most of the stuff in here. Please drop your comments if you are stuck somewhere.
Now you are ready to run your application with DataBase connected
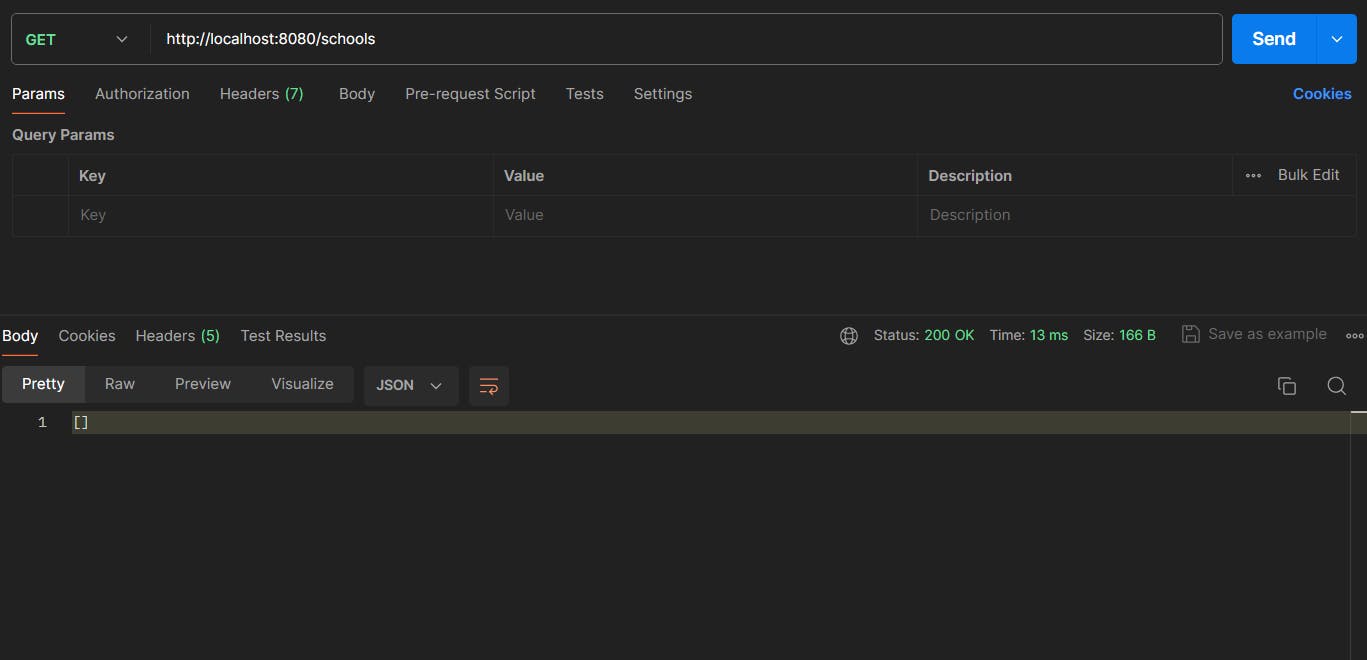
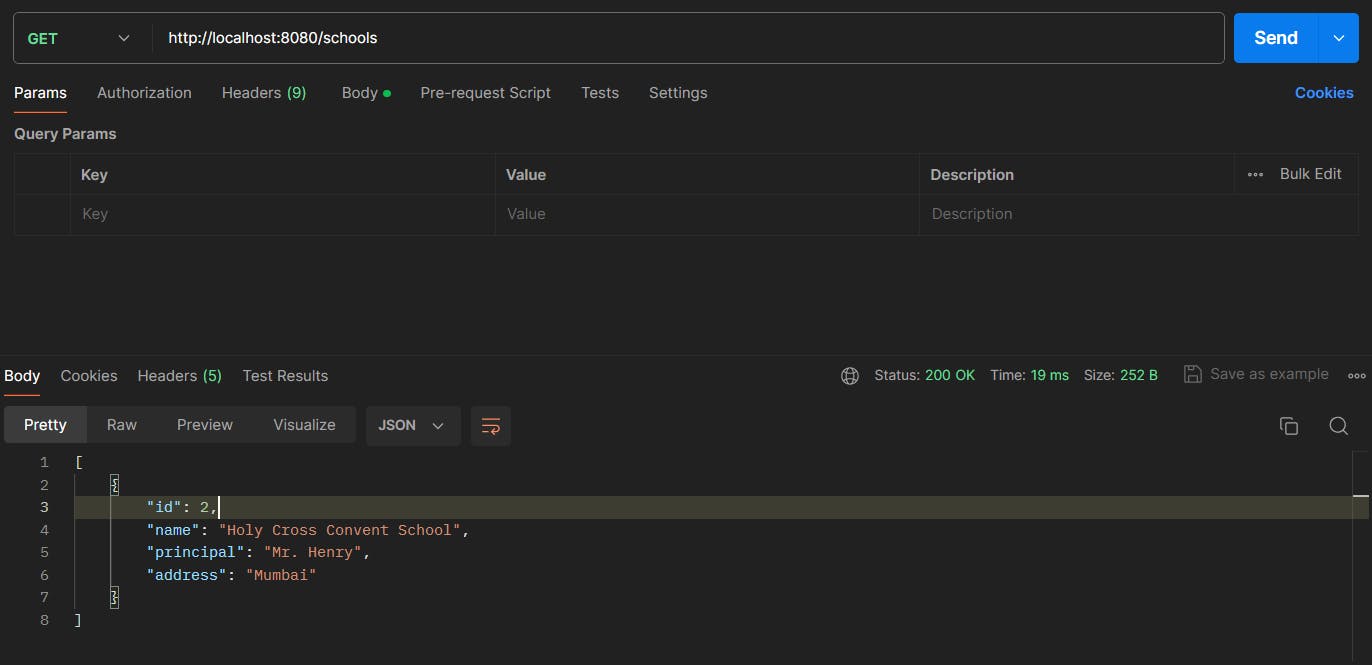
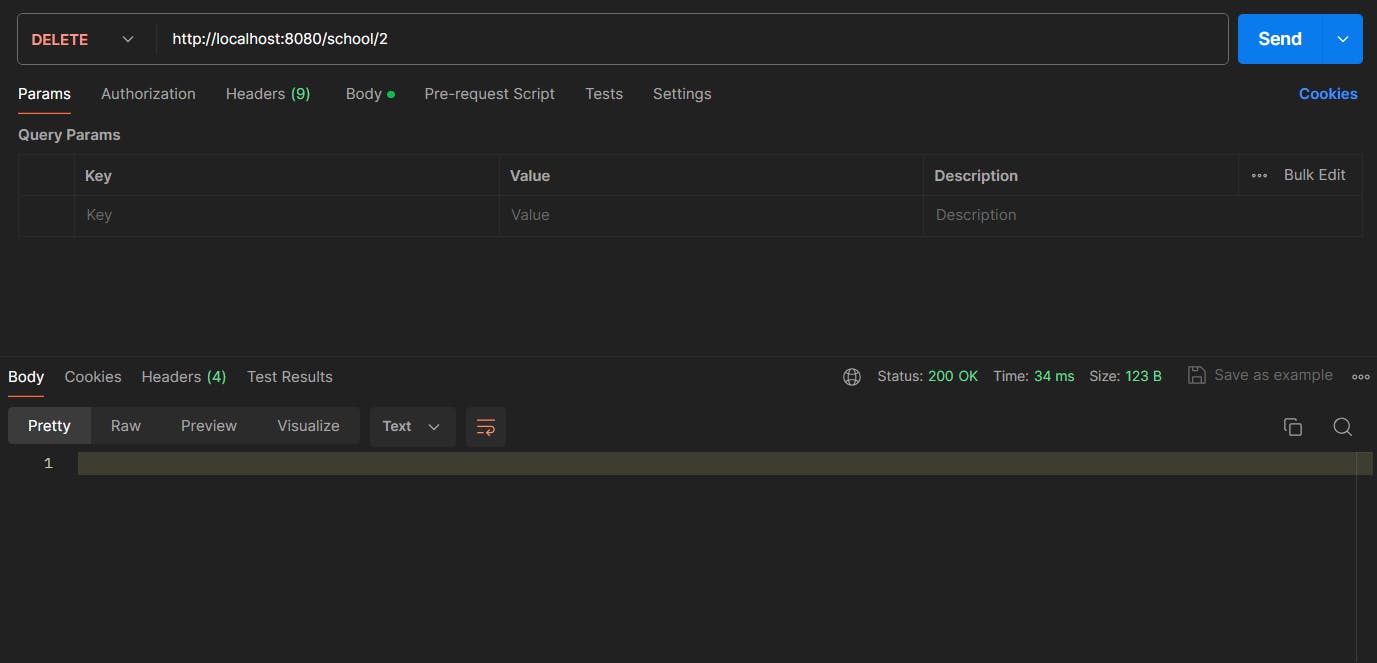
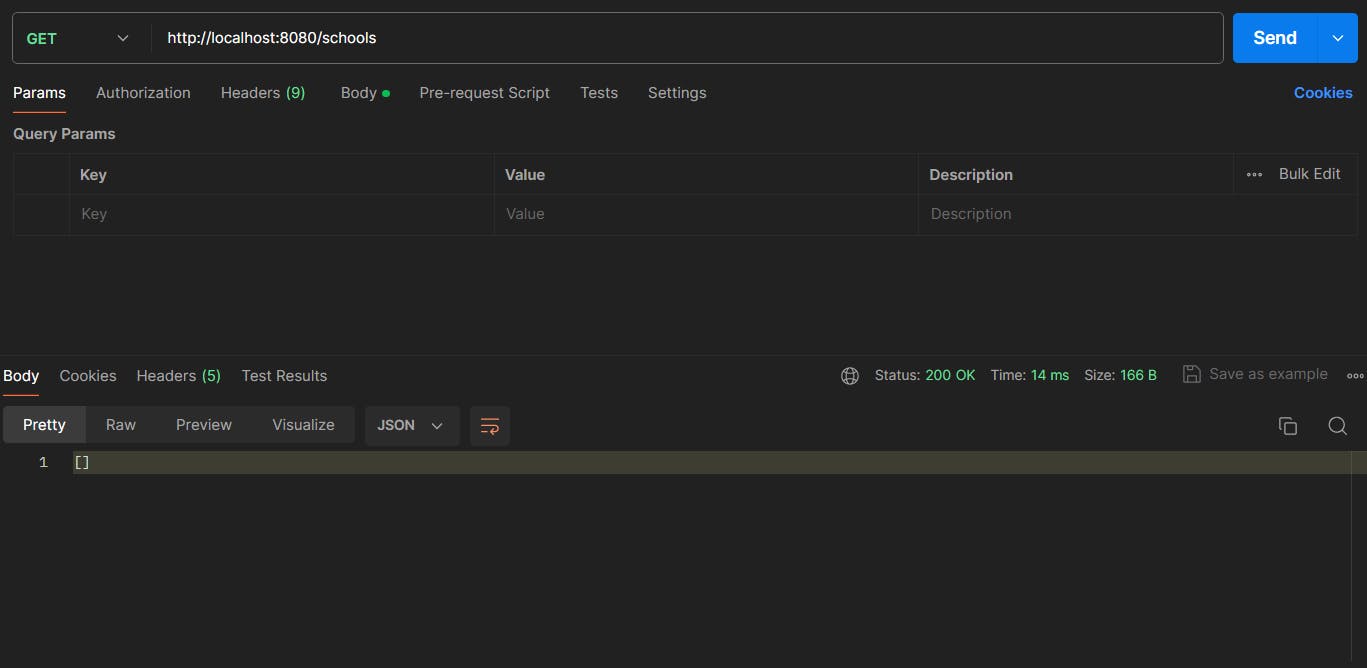
Testing Your Spring Boot API with Postman
Now that we've built our basic functionalities, let's put them to the test! Postman is a popular tool for sending HTTP requests and inspecting responses, making it perfect for testing our Spring Boot API.

Congratulations on reaching the end of this beginner's guide! Now that you've built your foundational knowledge, are you ready to dive deeper? Feel free to share your learning experience in the comments below. Did you encounter any challenges? What are your next steps in the world of Spring Boot API development?
Remember, this journey doesn't stop here. I'm here to offer support and answer any questions you might have. Let's build amazing APIs together!
Read this post, if you need to know more on how to test your newly developed APIs.